Whilst developing a recent project, I found that I needed to create FX nodes outside the context of an FX application (an experiment in code generation). This led me to consider how to create unit tests without a dependency on TestFX, as I only needed to create FX nodes without ever displaying them, but wanted to ensure JavaFX threading issues were taken care of. I came up with a solution, but it could also be used for normal JavaFX unit tests as well (with caveats).
I do not recommend my solution as a replacement for TestFX or similar frameworks – this approach suites my particular requirements, and may suite yours. I still use TestFX extensively and have no plans to stop doing so.
The Benefits
Simpler to test FX object creation, outside of an FX application (my use case)
Tests run faster
For applications, does not highjack your mouse when it runs (no need for headless-mode monocle setup)
Create a different application in every test
The Downsides
Slightly (?) clunkier code
For applications, you cannot watch the tests run and see what they are actually doing
May need to duplicate (a little or a lot of) TestFX helper functionality
Key Steps
Create a plain old JUnit Test class
Initialize the FX toolkit in a @BeforeClass/@BeforeAll static method
This class just wraps calls to Platform.runLater and runs a block of FX code in the FXApplication thread and ALWAYS blocks until the FX Thread is done. Here is a minimal example:
All FX setup code and unit test checks should run inside an FXBlock. This is the “clunky” bit.
A Complete Example using JUnit 4
The full class is here. There is lots of scope to tidy things up, but the code below works. There’s no magic anywhere, just the FXBlock class to simplify the logic.
class NoTestFXTest {

  companion object {
    @BeforeClass
    @JvmStatic
    fun startJavaFXRuntime() {
      Platform.startup {}
    }
  }

  @Test
  fun fxThreadTest() {
    // when
    val ap = AnchorPane()

    FXBlock(Runnable {
      val stage = Stage()
      ap.prefHeight = 200.0
      ap.prefWidth = 240.0

      val label = Label("Empty")
      ap.children.add(label)

      val button = Button("OK")
      button.onAction = EventHandler { label.text = "button clicked" }
      ap.children.add(button)

      stage.scene = Scene(ap)
      stage.show()
    }).run()

    // then
    FXBlock(Runnable {
      val button = ap.children.find { it is Button } as Button
      button.fire()

      val label = ap.children.find { it is Label } as Label
      assertThat(label.text).isEqualTo("button clicked")
    }).run()
  }
}
Conclusion
This approach requires recreating TestFX functionality, and so would not be the best approach for the vast majority of test scenarios. I will use it for my FX code generation project, as I don’t need to test complete JavaFX applications, just the creation of FX nodes and scene graphs.
That said, my previous experience with duplicating TestFX capabilities like “Find By Id”, “click node with Id” was pretty good – it did not take long and worked well. So if some time in the future, TestFX stops being maintained – I have a fallback plan.
The most well-known library for unit and integration testing JavaFX applications is TestFX. I have written some tests inside the application to run Junit-driven tests using TestFX – https://github.com/SergeMerzliakov/javafx-app-1.
TestFX works much like any other JUnit oriented testing library and to set it up you need to do 3 things:
Add the testfx libraries as dependencies to build.gradle
Make your Test classes inherit from org.testfx.framework.junit.ApplicationTest
Implement the start() method to create the app to test
Ensure all to-be-tested controls have a unique JavaFX Id
Point 4 above is optional but I think it is good practice.
Nothing more to add here. We’ve all done this before.
Step 2 – Set Test classes to inherit from ApplicationTest
This adds TestFX magic juju to your test classes.
class MyClassTest : ApplicationTest() {
  ...
  ...
}
Once again, nothing revolutionary so far. Sure, we are using up our inheritance ‘slot’, and maybe an annotation based approach would have been nicer, but such is life.
Step 3 – Implement the start() method
ApplicationTest has a single method you need to override, which is almost the same as the start method used to start a JavaFX Application. The example below creates a loader so that we can keep a reference to the FXML’s controller class, which is useful for testing.
...
private lateinit var controller: Controller

override fun start(stage: Stage?) {
  // We instantiate a loader directly so we can access the controller for testing
  val loader = FXMLLoader(javaClass.getResource(“/dir1/dir2/application.fxml"))
  val root = loader.load<VBox>()
  stage?.scene = Scene(root)

  // keep a reference to the controller for our tests
  controller = loader.getController()
  stage?.show()
}
...
Step 4 – Ensure Controls All Have Unique JavaFX Ids
You can do this is a few different ways:
SceneBuilder
In code
Hand editing the FXML file
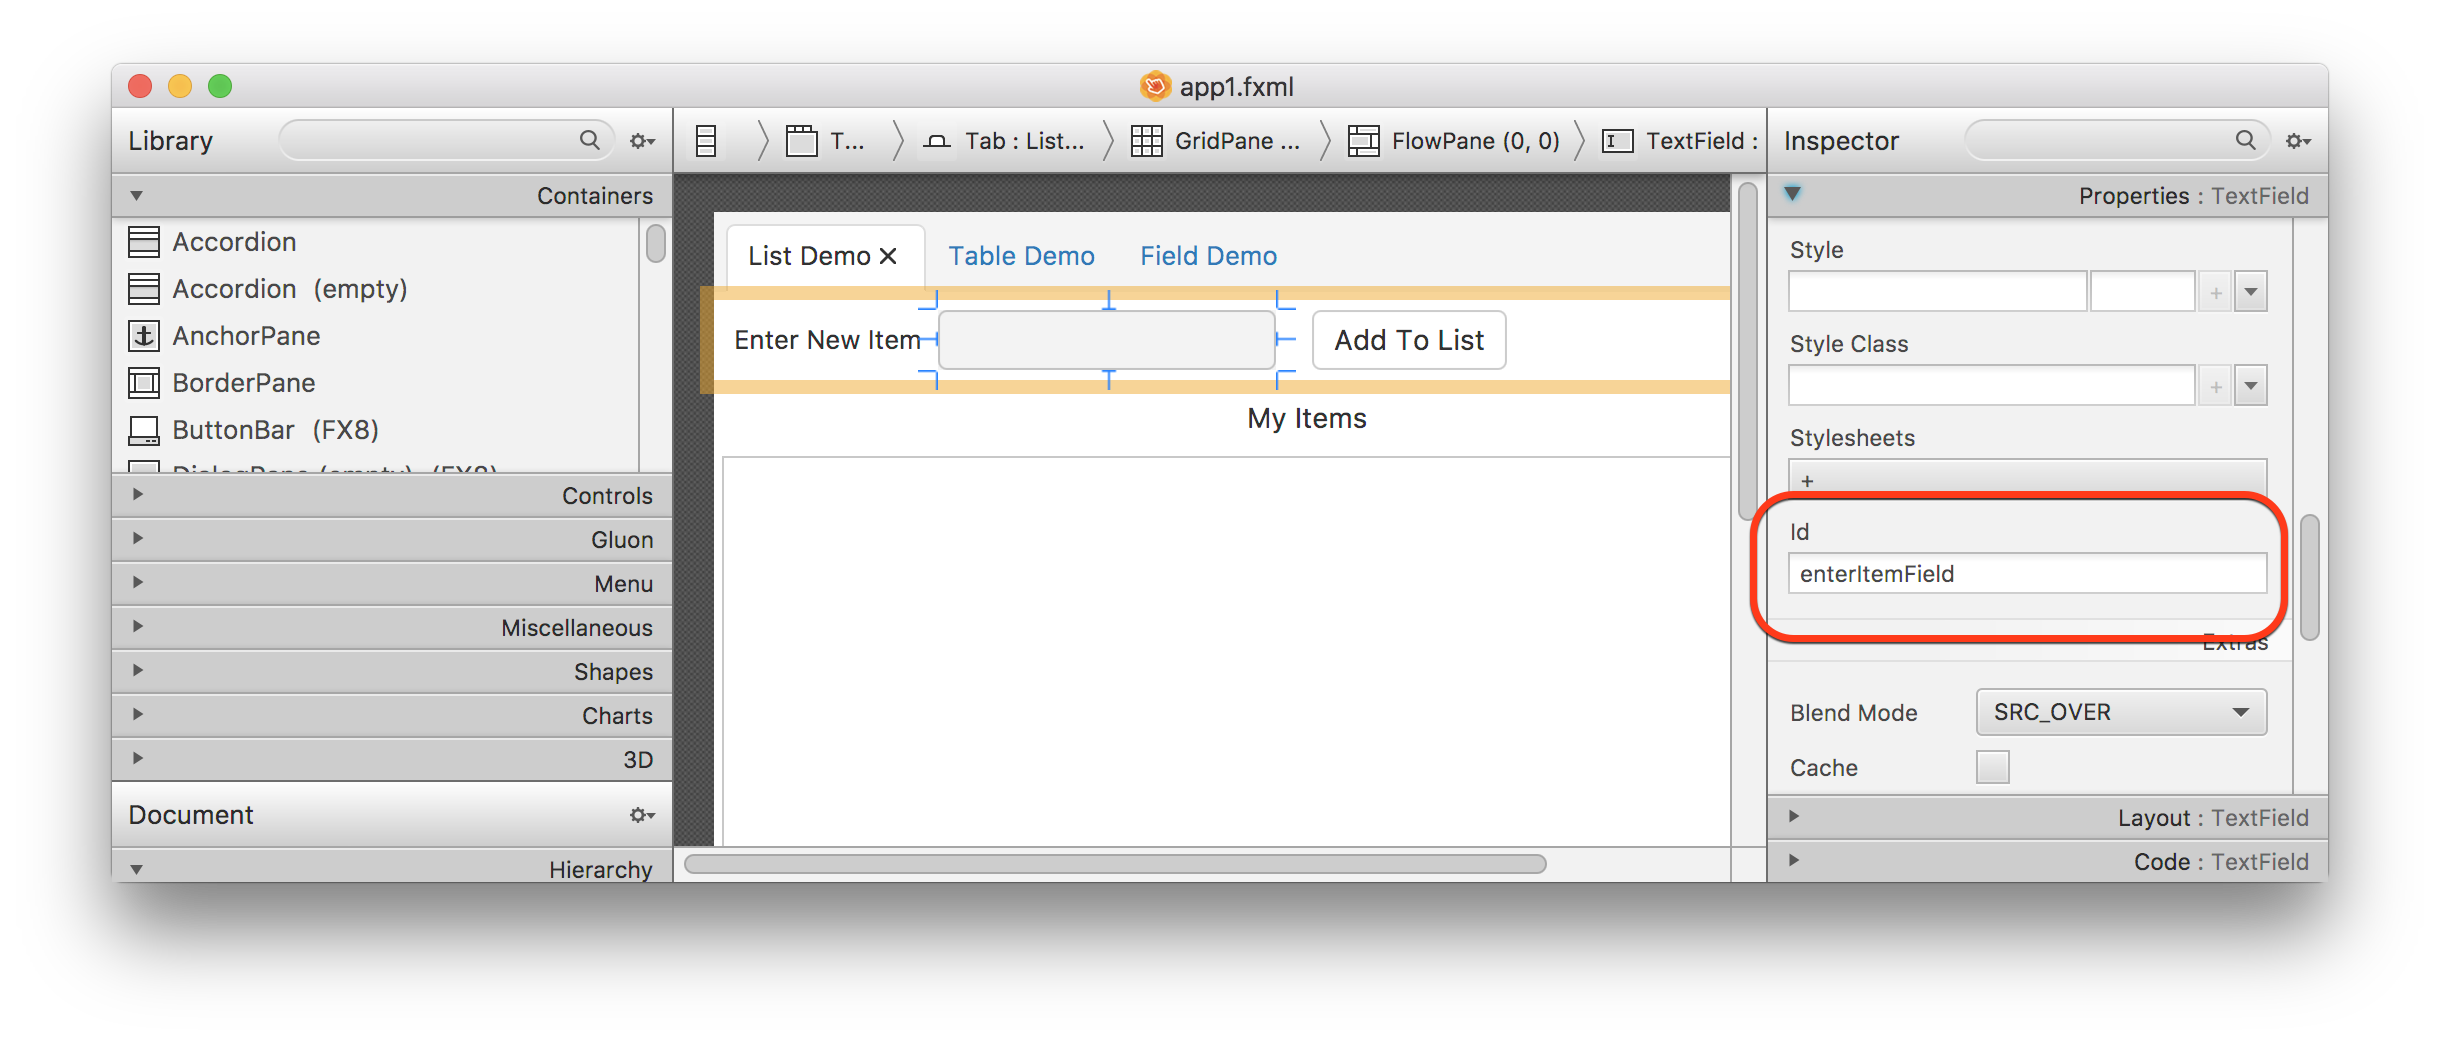
Setting JavaFX Id inSceneBuilder
Just a screen shot for this one. Just have to know which text box to fill in.
JavaFX ID is the same as a CSS ID Selector. You know, like #greenButtonWithSharkLogo
Setting JavaFX Id in Code
@FXML
fun initialize() {
    ...
    tableView.id = “tableView"
}
This part is very much same as for writing any JUnit tests, but uses the TestFX robot helper functions to simulate a user.
The conceptual steps are:
Find the control to test in the node graph
Perform some action on the control
Check the results on the model and/or view
Step 1 – Find the Control to Test in the Node Graph
You use the org.testfx.api.FxRobotInterface.lookup() method to find the control you need. There are a few ways of doing this:
Using the text of a labelled node:
val cancelButton = lookup(“Cancel”).query<Button>()
Using the CSS class of a node:
val allButtons = lookup(“.button”).queryAll<Button>()
Using the JavaFx id of a node:
val pinkButton = lookup(“#thirdPinkButtonOnTheLeft").query<Button>()
Using a whole CSS selector:
val helpButton = lookup(".small-button #helpButton").query<Button>()
I prefer the methods using the JavaFx id, as they can be made unique and less prone to CSS changes.
Step 2 – Perform Some Action on the Control
There are lots of these in org.testfx.api.FxRobotInterface. The most common being clickOn(), doubleClickOn(), write() and type().
At this point you can perform some actions, such as:
Pushing a button
clickOn(“#updateButton”)
Entering text in a field (once it is selected or has focus)
clickOn("#SomeTextField")
write(“This is the text in the currently selected field”)
Hitting enter or tab key:
type(KeyCode.TAB)
type(KeyCode.ENTER)
Step 3 – Check the Results
You can check the model, the view or both.
If the data model is an ObservableList<T>, checking both model and view containers is not really necessary, as the view gets updated automatically whenever you alter the contents of the model . This is AWESOME by the way! One line of code, and no more addThisListener() or addThatListener()……
If your model is a just a standard collection of some kind, and you manually manage model-view synchronisation, then testing both model and views after UI operations makes sense. Any such data model tests probably belong in another test, and not lumped in with UI tests.
Checking the Model
// check model after removing an item from the list view
assertThat(controller.friends).hasSize(originalModelCount - 1)
Checking the View
// check ListView items reduced by one.
assertThat(friendView.items).hasSize(originalViewCount - 1)
A Complete Example
ItemTabIntegrationTest.kt
/**
* Use Junit TestFX to integration test the application UI, so
* not unit tests per se.
* BetterApplicationTest is a subclass of TestFx class ApplicationTest (discussed below)
*/
class ItemTabIntegrationTest : BetterApplicationTest() {

  // Node Ids defined in the FXML file. Same as a CSS Id selector
  // Use these to uniquely identify JavaFX controls for testing
  companion object {
    const val LIST_DEMO_TAB = "#listDemoTab"
    const val ITEM_LIST_VIEW = "#itemListView"
    const val ENTER_ITEM_FIELD = "#enterItemField"
    const val ADD_ITEM_BUTTON = "#addItemButton"
  }

  private lateinit var controller: Controller

  override fun start(stage: Stage?) {
    // we instantiate a loader directly so we can access the controller for testing
    val loader = FXMLLoader(javaClass.getResource("/app1/app1.fxml"))
    val root = loader.load<VBox>()
    controller = loader.getController() // keep a reference for our tests
    stage?.scene = Scene(root)
    stage?.show()
  }

  @Test
  fun shouldAddItemToList() {
    val initialCount = controller.listModel.size


     //ensure correct Tab has focus
    clickOn(LIST_DEMO_TAB)


    //create new item for list - should appear at the end
    val newItem = "Zoo"
    clickOn(ENTER_ITEM_FIELD)
    write(newItem)
    type(KeyCode.TAB)
    clickOn(ADD_ITEM_BUTTON)

    // check model updated
    val modelCount = controller.listModel.size
    assertThat(modelCount).isEqualTo(initialCount + 1)

    // check view updated
    val viewCount = controller.itemListView.items.size

    // this method is in declared in the base class
    val zooListItem = getListViewRow(ITEM_LIST_VIEW, viewCount - 1)
    assertThat(zooListItem.text).isEqualTo(newItem)  }
}
BetterApplicationTest.kt
I have created a subclass of org.testfx.framework.junit.ApplicationTest and added some methods to manipulate listView and tableView data. All tests in app1 and app2 in the repo inherit from this. A better way may be to create a ViewTestUtils object with these methods in it, but you would need to pass in an instance of the ApplicationTest.
Neither option excited me, so I went with the simplest option – subclassing. I am keen to fix this as I use these helper methods a lot, and the subclassing approach has limited traction across a real project with hundreds of tests.
open class BetterApplicationTest : ApplicationTest() { /** * Helper function to get a row from a TableView * * Creating a generic version of this function ==> fun <T:Any> getTableViewRow(viewId: String, row: Int): T * * is very tricky and I did not quite succeed. Ah, so close... * * see:https://stackoverflow.com/questions/43477903/instantiating-a-generic-type-in-kotlin */ fungetTableViewRow(viewId: String, row: Int): SomeProperty { val tableView = lookup(viewId).query<TableView<SomeProperty>>() val cell1: TableCell<SomeProperty, String> = from(tableView).lookup(".table-cell").nth(row * 2).query() val cell2: TableCell<SomeProperty, String> = from(tableView).lookup(".table-cell").nth(row * 2 + 1).query()
return SomeProperty(cell1.text, cell2.text) }
/** * Helper function to get a row from a ListView. * Type T is the type of the ListView data model. */ fungetListViewRow(viewId: String, row: Int): ListCell<String> { val listView = lookup(viewId).query<ListView<String>>() return from(listView).lookup(".list-cell").nth(row).query() }
/** * Helper function to get a row starting the given text from a ListView. * Type T is the type of the ListView data model. * * This method is a bit dodgy, but illustrates how to access listView row data * */ fun <T> getListViewRowByFirstName(viewId: String, textToFind: String): ListCell<T>? { val listView = lookup(viewId).query<ListView<T>>() val cells = from(listView).lookup(".list-cell").queryAll<ListCell<T>>() // assumes type T has a toString method starting with first name! return cells.find{ it.item.toString().toLowerCase().startsWith(textToFind.toLowerCase()) } } }
DRAG AND DROP
Getting TestFX to test drag and drop operations is surprisingly easy. After wasting my youth on lots of fun and games with SWT and Swing, I mentally readied myself for an epic battle of wits and stamina, only to succeed very quickly. What a letdown.
So a snippet from one of Drag and Drop tests looks like this:
@Test
fun shouldDragSingleFriendBetweenTwoListViews() {
   .....
   // drag a single friend from friendListView to PartyListView
   dragFriendToParty("Andrea")
   ......
}

private fun dragFriendToParty(firstName: String) {
   // find friend by first name via dodgy utility method
   val friend = getListViewRowByFirstName<Person>(FRIEND_LIST_VIEW, firstName)

   // drag and drop automation is just this line!
   drag(friend).dropTo(PARTY_LIST_VIEW)
}
Whilst it’s a bit strange at first, once you get your head around the TestFX way of doing things, it quickly becomes easy to write tests for your user interface, and will become an indispensable part of your automated test arsenal. TestFX can be used for unit testing individual components as well, even though the examples here focus on testing entire applications.